Swedish bagpipes
How to play
|
|
|
I often get questions on playing technique - how to do this or that on
a Swedish bagpipe. I have collected some tips and tricks on playing
technique below. I assume (unless stated otherwise) that you have a Swedish
bagpipe in E/A, i.e. with a chanter with the usual range between D' (or
D#') and E''.
There are three sections. The first, "Necessities" is for beginners,
on how to play the pipes at all. Fancy playing techniques come further
down, in sections "Gracings" and "Advanced".
|
Necessities |
Holding the instrument
The bag is usually tucked under the left arm, with the left hand
above the right on the chanter. Some pipers hold the bag in front and
press it towards the chest.
The front of the chanter contains 6 or 7 depressions, in English often called scallops, for the fingers. Older intruments may lack the bottom one - the one for
the right hand little finger (pinkie) - but, if so, there is usually a
hole there anyway, possibly on the side of the chanter (that is
actually a tuning hole, but you should be able to reach it with your
little finger). The second scallop from the top usually contains two holes,
on some chanters also the first. There are one or two scallops on the backside
of the chanter.
The three first scallops, counting from the top, are meant for your
left hand index finger, long finger and ring finger, respectively. The
next scallop is for you right hand index finger, and so on. The left
hand little finger is not used. The hole(s) on the backside is/are of course
meant for you thumb(s).
The picture to the right shows the front and back of a chanter in
E/A. The black rings are rubber rings, cut from a bicycle tyre and
used for fine tuning. The back side of this particular chanter has
three holes. The one at the bottom is a tuning hole - it has no
associated finger. The names beside the chanter tells which note is
heard when the correspondin hole is open and all holes above it are
closed.
Traditionally, but also for technical reasons I will return to,
bagpipes are usually played with straight fingers. Some pipers cover
the finger holes with the middle part of the fingers, others
with the end part (but, if so, still with the pad of the finger, not
the tip). Personally, I do both. With my left hand, I cover the holes
with the end part, while the right hand covers the holes with the
middle part.
The most important thing, though, is to be comfortable. To play well, you must
be relaxed, which is hard enough anyway since the left upper arm is not. It may help to now and then shake off the stress in your left hand, or to stretch it by bending your hand up as much as you can with a straight arm. The perfect grip is so relaxed that you can actually feel the vibration of the air pushing on your fingers, when you play.
|

Front and back of a chanter in E/A.

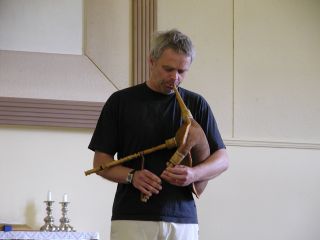
The most interesting part of a piper's body. This is a chanter in D/G and
the piece of metal on top is a key for top E (corresponding to F# on an
E/A-chanter, but E/A-chanters do not normally have such a key). The
print on the T-shirt is a 16th century drawing of a bear and a
bagpiper, from Olaus Magnus' stories about the Nordic people.
Photo: Mikael Larsson
|
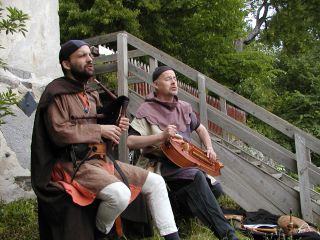
If you only blow air into the bag when you have to, you may find time to
sing along while playing! (the instrumentet to the right is a
hurdy-gurdy, played by Jan Winter)
Photo: Anne-Marie Eriksson
|
Blowing technique
Beginners often blow into the bag constantly, until they have to take
a quick breath. To do that is exhausting, and it may be difficult to
maintain a steady tone.
The air pressure, in the bag, should be essentially constant, and this
pressure should be maintained with your arm, not with your
lungs or diaphragm! Fill the bag only when you have to, i.e. typically
not until you have squeezed out a lungfull from it with your arm. Do
not keep the mouthpiece in your mouth, let it go when you don't need
it. If you must fill the bag more often than every 5 seconds,
something is wrong with your bag (it leaks) or your reeds (they
require too much air).
Release your arm pressure somewhat when you blow, to compensate for
the incoming air. To learn how much to release pressure requires
practice: Maintain a low note for a long time (several minutes)
without fluctuations. Record this attempt on tape and then listen to
yourself afterwards. It is a boring tune to listen to, I'm sure, but
you may learn from it.
|
Fingering
Compared to other instruments, the Swedish bagpipe is very forgiving
when it comes to fingering. Most pipes keep in tune, no matter what
you do with your fingers below the uppermost open hole. However,
fingering does affect some of the playing techniques and tricks
discussed later.
A beginner typically plays with open fingering, which means
that you lift all fingers from below and up to the sounding finger
hole. If you play low E you have all your fingers, except your right
little finger, on the chanter. When you play A you can wave to your mother in
the audience with your right hand and when playing top E you can wave
with the chanter, because nothing is holding it! (unless you keep one
or two right hand fingers on the chanter just to hold it still)
The opposite is closed fingering, where the starting point is
bottom E, i.e. all fingers, except the right hand little finger, on the
chanter. When playing another note, you lift the corresponding finger
for that finger hole, but only that finger. (Of course, if you want to
play low D/D# you close the finger hole under the right hand little finger
instead.)
Most experienced pipers use a fingering inbetween these two extremes,
but more closed than open - halfclosed fingering. To keep as
many fingers on the chanter as possible (n.b. except the right hand
little finger) makes it easier to jump between two notes that are far
apart, since fewer fingers need to move. A special case of that is
staccato playing (see below). Closed fingering also affects sound a
tiny bit (the sound becomes a little bit softer using closed
fingeringen). But, depending on the size of the finger holes, some
notes may play slightly out of tune if you play them completely
closed. You should try this out on your own chanter.
|
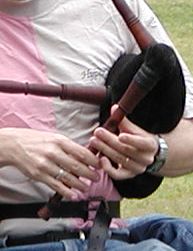
Look Ma! He is playing a closed D!
Photo: Anne-Marie Eriksson
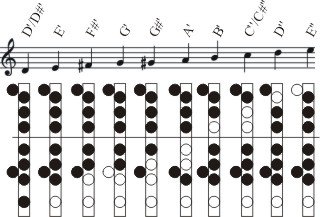
An example of halfclosed fingering. Under each note is a schematic
figure of the chanter, where a filled (black) circle denotes a closed
finger hole and an unfilled (white) circle denotes an open finger hole.
The two thumb holes are drawn outside the chanter. The horizontal line
marks the border between the left (top) hand and the right (bottom)
hand.
|
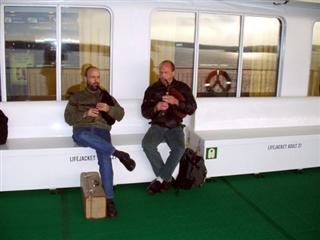
Bagpipers don't need lifejackets!
(the guy to the right is Mikael Larsson, and we are on our way to a bagpipers' meeting in Estonia, summer 2004)
Photo: Hans Rönnegård
|
Note separation
How do you separate the notes when the same note should be played
twice in a row? This problem is probably unique to bagpipes. A
pianist who wants to play the same note, X, several times, simply
presses the X key several times. A flute player separates the notes
with his/her tongue, forming a "T" or "K". The fiddler changes the
direction of the bow stroke. In all three cases there is a short break
between the notes. But the bagpipe is never silent (wouldn't your
neighbours wish ...), so how is it done?
Well, you will have to create the acoustic illusion of a break, by
playing another note, Y, inbetween. In other words, you play XYX, but
Y is played so short that it not heard as a note, it only separates
the X's.
There are two basic ways to to this, depending on whether Y is above
or below X in the scale. A cut is when Y is above X. The note
A, for example, can be cut in two by twitching any left hand finger
(lift it and immediately lower it again). Since the note should be
played so short that it isn't heard as a note, it should not matter
which finger you twitch. However, it is not easy to do this well on
Swedish bagpipes, since the notes above X are also stronger than X.
So it is a good idea to choose which finger you twitch, so that, if the
note is heard, it fits well with the melody.
Sound example of a cut
The other case is when Y is below X in the scale. This is called a
tap because what you do is to quickly tap the finger hole for
the sounding note with the corresponding finger. The middle note, Y,
produced by doing this depends on the fingering - Y becomes the
note of the uppermost open finger hole below X. In my opinion it is
much easier to tap well than to cut well, i.e. to do it without the
middle note, Y, being heard as a note.
Sound example of a tap
A third way to separate the X notes is to play the first one
staccato. See the next tip. You might think of this as a
special case of a tap but is not quite the same thing.
|
Short notes (staccato)
You might argue that this does not belong to the "necessities"
category, but in my opinion it does. In particular when playing for
dancing, it is very important to produce a clear beat, and then it
helps a lot if you can play with a bounce!
If you want to play short notes, it helps if your fingering is as closed as possible
(see the tip on fingering above). The trick is to play the note in
question and then immediately go down to low E, which is then usually
not heard as a note, but as a pause (especially if you have a drone
which also sounds in E). The technique is often called "rapell". If you play fully closed, you only have to move one finger to do this. If you play open, you must put several fingers down on the chanter at exactly the same time, which is difficult.
Sound example
Tip: This illusion does not work very well if the note you want to play
staccato is close to the note you jump to (low E). Furthermore, no note
works well staccato if the next note in the melody is low E, since when
you get to that note in the melody, you are already there and must
break it with a cut or a tap (see the section on note separation
above).
Sometimes I jump to some other note than low E, which may give
the illusion that I play second voice with myself. Sound example: Springlek från Lima.
If you plug the chanter end and any tuning holes you might have below
the lowest finger hole, you can play true staccato's (really make the
chanter silent) by closing all finger holes. But, if so, you also lose
one note - low D/D# - since that is when the chanter is silenced. If
you sit down when playing, you can refrain from plugging the chanter
and, thereby, keep the possibility to play D/D#. When you want the
chanter to stop, you play D/D# but at the same time lower the chanter
end to your leg, temporarily plugging it. (You may recognize this
technique if you have seen an Irish Uilleann piper in action)
|

Two Norwegian halling dancers in Ransäter 2003. These guys really depend on the music being played with a clear beat!
Photo: Anne-Marie Eriksson
|
|
Gracings and other decorative frills |

Mikael Larsson in deep concentration
(Pipers' meeting in Gagnef 2002)
Photo: Anne-Marie Eriksson
|
Grace notes
A grace note is a short note, played just before the melody note it is
supposed to decorate. On bagpipes, melody notes are usually graced
from above, i.e. the grace note is above the melody note in the
scale. This makes it equivalent to a cut, as discussed before in
the section on note separation. The only difference is that, here, it
is just a decoration, not a necessity. This also implies that, this
time, we want the extra note to be heard.
I usually try to choose my grace notes so that they fit the melody,
i.e. notes that would have made a good harmony to the melody.
Sound example 1
Grace notes can also be an effective way to mark the beat, in particular
if combined with a staccato of the melody note you end up on.
Sound example 2
If you want, you can take this to the extreme, playing several grace
notes in sequence to form arpeggio's (broken chords):
Sound example 3
|
How to vibrate notes (vibrato)
The most common (and most simple) way to play vibrato is to repeatedly open and close
one or several finger holes below the sounding hole. The fingers
flutter. The effect depends on the size of the finger hole of the
sounding note. A small finger hole gives a greater vibrato effect than
a large one.
Sound example
Which finger(s) to flutter depends on the note and the chanter. You'll
simply have to try it out. I vibrate all notes above A with the same
finger - my right hand index finger. Sometimes, I vibrate the left
hand thumb hole, top E, with the left hand index finger. The lower
notes, I vibrate with the finger immediately below the sounding
hole. Of course, the very lowest notes, E and D/D#, can not be vibrated
this way.
If you where to flutter the finger for the sounding note, instead of a
finger below that, the note would change to some other (lower)
note. It would produce a trill, rather than a vibrato. But, if you hit
the finger hole on an angle, on purpose missing part of the finger hole,
you can get a vibrato effect. The problem is to hit it exactly right
every time. If you cover too little of the hole, there is no effect
and if you cover too much of it you produce a trill instead of a
vibrato. This is much more difficult than to flutter the fingers below
the sounding hole, as described above.
Other variants include shaking the chanter (up and down or to the
sides) and to squeeze the neck of the bag with the right hand (if it
is free). The latter sounds quite funny - like a waw-waw effect.
|
Stefan Ekedahl in action
(Pipers' meeting in Gagnef 2002)
Photo: Anne-Marie Eriksson
|
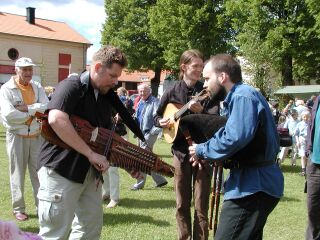
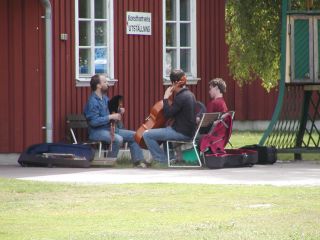
Jam session in Ransäter, 2003
Photo: Anne-Marie Eriksson
|
How to slide up to a note (glissando)
Instead of lifting the finger the usual way, uncover the finger hole
gradually. If you play with straight fingers you can bend them off the
hole. Some piper roll the fingers off (upwards). If you play with the
end part of the finger, you can pull it to the side, towards the
hand. I usually bend.
Sound example
|
|
More advanced techniques (to extend the scale, etc)
Note! The tricks below may not work on all bagpipes!
|
Volume control when playing with others
One limitation of bagpipes is that it is difficult to adjust
sound volume. In particular when playing together with other instrument, or
if someone is supposed to sing along, this can be a major problem.
If you have several reeds to select from, choose the right one for the
right occasion. Different reeds can differ much in sound volume.
You can adjust sound volume somewhat by varying you arm pressure on
the bag. Unfortunately, the notes often vary more in pitch than they
do in volume (in particular notes close both ends of the chanter's range).
Fingering actually has some effect (though small) on volume. Closed
fingering is more silent than open. At least to a person in front of
you (e.g. your audience). When you play closed, much of the sound is
directed down, towards the floor. When you play open, much of it is
directed towards your audience, through the finger holes. This is also
why top E, the thumb hole note, sounds so much stronger than the
others to the piper. (It is stronger than the others, but
not by as much as the piper might think).
If you play together with a weaker instrument which is to take over
the melody, pull the lower half the chanter towards you and bend
forward slightly. The combination of a slight decrease of bag pressure
and the chanter suddenly being positioned in parallel to the floor
(i.e. with the finger holes directed down), may actually help a lot. If
you also take a step or two backwards, this can be quite effective.
(The audience might think that you are bowing to them, but that's not
a problem, is it?)
The upper half of the scale is stronger than the lower half. If
someone else is taking over the melody, and you are to play a second
voice, keep in the lower half of the scale. Maybe you don't have to
play the second voice either - you may want to stay put on low E, as a
drone, for a while.
|
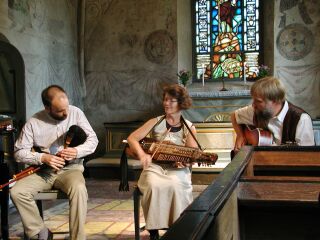
The Celsius trio in Viksta church, August 2002. Me, Elisabet Börjesson and Gunnar Börjesson.
Photo: Anne-Marie Eriksson
|

Your's truly, playing a tune at Byss-Callestämman in Uppland, 2004. Even a
small extension to the Swedish bagpipe scale is helpful when playing
tunes from Uppland (most of them are intended for Nyckelharpa, which
has a much wider range than the bagpipe)
Photo: Anne-Marie Eriksson
|
Top D#
Some chanters have two finger holes under the left hand index finger,
of which the upper one (D#) is usually covered by bees-wax or
similar. This is the same principle as the double hole one step below
(used to switch between major and minor). But you can acually play D#
without that extra finger hole.
If you come from above, i.e. from top E, it is not that
difficult. Lift your left index finger as if to play D, but do not
cover the thumb hole in the usual way. Instead, bend you thumb and
force your thumb nail into the hole. In theory you should not have
to lift the D-finger (the index finger) at all, but in my experience
it is easier to find a true D# that way. Besides, if you cover the
D-hole, your chanter may start screaming instead (an effect which
will be exploited later).
Sound example
When I go directly to D# from below, I bend my thumb in place - I
never lift it from the hole. But it is sometimes easier to just slide
the thumb down, to uncover the upper half of the hole, without using
the nail.
|
Top F
Play top E, i.e. lift your left thumb, and then gradually increase
pressure on the bag with your arm. The note goes sharp, doesn't it?
If the reed is too stable, nothing much happens. If it is too weak, it
may stop (from sounding, completely). But if your reed is just right,
you can reach F this way, or even higher. With a really good reed
(and some practice) you can go directly up to F, without sliding up, by
increasing the pressure by the right amount at exactly the right moment.
Sound example
Music example: Brudmarsch från Dalby
|
We both play with a bow!
Magnus Holmström and me in Österbybruk, 2003.
Photo: Anne-Marie Eriksson
|
Now, doesn't this look nice? (Ransäter 2004)
Photo: Anne-Marie Eriksson
|
Bottom C#
This only works on chanters with a tuning hole below the hole under
your right hand little finger. I assume that the note you get, when covering
the hole with your right hand little finger, is a D (on some chanters it is a
D#). If so, and with some luck, you can go down even furter, to C#, by
pressing the chanter end to your leg. You probably want to sit down
when you do this. The only open hole, when you do this, is the tuning
hole.
In the following sound examples, I play on a chanter in D/G, so the
low note is actually a B, but it is produced in the same way.
Sound example 1 (The lowest note sounds more closed in than the others. It is, after all ...)
Sound example 2 (The end note of the lower voice)
Music example: Bröllopsmarsch efter
Nedergårds Lars (Sound example 1 above was cut from this tune,
which also happens to be an example of a tune being played in the "wrong"
key - see below)
This is not easy - the chanter may stop, or scream. Even if it does
work, the note produced may not be quite in tune. In the second
example above, you can hear that it takes some time for the note to
converge (I compensate with the arm pressure on the bag). If you need
to flatten the note you get, you can put some bees-wax on the
lower edge of the tuning hole. (in the lower edge, to
minimize the effect on the D note, which is tuned using the same
tuning hole).
|
Switching between major and minor while playing
Usually, the piper tunes the chanter to major or minor before starting
to play. This is done by uncovering, or covering, the upper of the two
finger holes under the left hand long finger (with bees-wax for
example). In other words, on an E/A-chanter you select in beforehand if
you want the left hand long finger to control the note C# (when in
major) or C (when in minor).
If both C and C# are required in the same tune, you should tune to
major, i.e. uncover the C# hole. C# is then played as ususal, by
lifting the finger. When playing C, you start bending it off instead,
as if you wanted to slide up to C# (see the question on
glissando). This you do until only the C-hole is open, then you
stop.
This requires that the C# hole is closer to the left hand side of the
chanter than the C hole, which is usually the case. Some pipers prefer
to roll the finger upwards instead. This has the advantage that it
works also if the C# hole is on the wrong side. Pipers who cover the
finger holes with the end part of the finger can pull the finger to
the side, towards the hand, instead of bending or rolling, given that
the C# hole is on the left hand side.
Sound example
Music example: Glad Sigfrid
|

Another jam session in Ransäter, 2003
Photo: Anne-Marie Eriksson
|
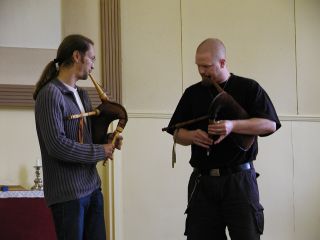
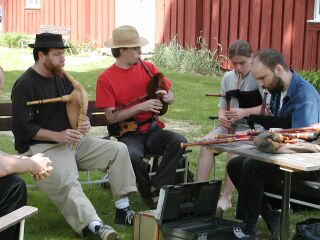
Rino Rotevatn and Mikael Lund
(Pipers' meeting in Gagnef 2002)
Photo: Anne-Marie Eriksson
|
Playing in G or D major on an E/A-chanter
This requires two things from your chanter.
- A hole for your right hand thumb, which many but not all
chanters have. This hole sounds G when uncovered.
- The bottom note must be D. On some chanters it is D#, but this
can be flattened to D by inserting a short piece of a drinking
straw into the chanter end. (The white spot at the end of Mikael
Lunds chanter in the picture to the left, is such a straw)
Now you have all the notes in the scale of G or D major. To play in D
major, tune your chanter as if you were to play in A major,
i.e. uncover the C# hole. To play in G major, tune the chanter to A
minor. In G major, the key note is under your right hand thumb, which
takes some getting used to. But when you have, you can play tunes
which would have required a top F# key if you had played them in
A-major! (This note now corresponds to the one under your left thumb,
since the scale has been shifted one step down).
Practice switching between A major and G major by playing the same
tune in both keys!
Music example: Bröllopsmarsch efter
Nedergårds Lars played in F on a D/G chanter (also an example of
the trick mentioned above, to reach an extra note below the normal scale, by
pressing the chanter end against the leg)
|
Top E, and beyond, on D/G-chanters without an E-key
Some chanters in D/G have a key above the left hand index finger,
sounding E when pressed. (The corresponding key on an E/A-chanter
would be an F#-key, but is very rare.) The hole uncovered by the key
is very close to the reed and the tone is therefore stronger and more
raw than any other on the chanter - you probably don't want to stay
there for long. However, on many D/G-chanters (depending on the reed)
you can take this note in another way, with nicer sound and without
using the key!
Play top D (lift your left thumb) with all other fingers, including
the right hand thumb and little finger, on the chanter. Now go
directly down to low C, i.e. cover the E-hole with your thumb, but at
the same time lower the arm pressure on the bag (a lot). It is very
probable that this causes the chanter to shreek instead of sounding low
C. That "shreek" is actually a note - on all chanters I have tried
this on, it is an E, i.e. the same note that would be reached by
pressing the key (if you have one), but the sound is much
nicer. Softer, like a falsetto. Unfortunately, it is difficult to time
the pressure drop so that the chanter produces an E at exactly the
right moment in the melody you play, so it is usually better to take
this note another way:
Play top D again, as above with all other fingers on the chanter. Now,
instead of covering the thumb hole the usual way, bend your thumb and
force your thumb nail into the hole. You then cover only part of the
hole (recorder players probably recognize this technique). With some
practice, you'll learn just how much of the hole to cover to produce
the same note as above, top E. The advantage is that you do not have
to decrease your arm pressure on the bag as much, and this makes it easier to
time right. On some chanters you can then lift you right hand little finger
and reach even higher than E.
In this Sound example I first play top E using the
key I have on my chanter. The second time I reach E by lowering the
pressure as above. The third time I use the trick with the thumb nail
instead. Finally, the fourth time I go up to F# by also lifting my right
hand little finger.
Unfortunately, this trick very seldom works on E/A-chanters - I don't
know why. This is particularly unfortunate, since E/A-chanters usually
do not have a key for the extra note either. But, so far, it has
worked on every D/G-chanter I have tried (including Estonian Torupills
in the same key). It seems to be more reliable on bellows blown
bagpipes than on mouth blown ones.
Tip: Don't practice this when your neighbours are in!
|
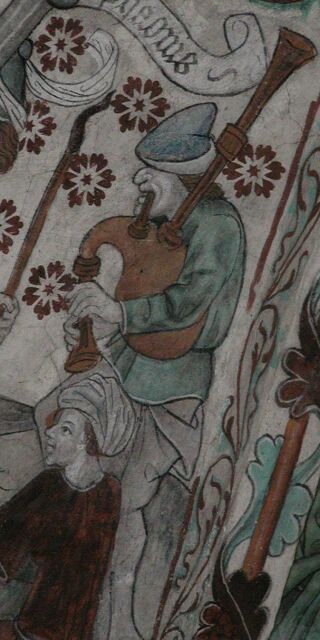
15th century bagpiper in Härkeberga kyrka in Uppland.
|
Conclusion: More than an octave and a half!
|
|
Just to show (off) that all these tricks are doable on the same
chanter, I include here a sound example where I play all the extra notes mentioned above. This, I do
on my chanter in D/G. It is difficult to play these notes in any
order, but they are all there. The range is now an octave and a fifth!
Yet, I have excluded a note which I can play sometimes, but only
sometimes (which is why I have not described it here) - a rough low A
on the D/G chanter (H on a E/A chanter). Including that, my chanter has
a range of an octave and sixth:

The range of my D/G chanter
Even if you, your chanter and/or your reed won't play along with all
these tricks, I'm sure that you can squeeze some extra notes
from it. Enjoy!
Olle
|
(The music) Previous page || Next page (Tunes for beginners)
|


